There’s something satisfying about a good bathroom renovation before and after. One photo shows a dated room you’ve put up with for years, and the next shows a space you actually enjoy using. But the photos only tell half the story. What happens in between, from the first plan to the final finishes, decides how good that “after” really is.
At Navigate Interiors, we’ve seen plenty of Perth bathrooms go from tired to transformed. In this guide, we walk through a real before and after from one of our Hillarys projects, along with the changes that make the biggest difference. We also cover a realistic bathroom renovation timeline and the bathroom renovation mistakes worth avoiding along the way.
A Real Bathroom Renovation Before and After: Our Hillarys Ensuite
This ensuite in Hillarys shows how much a well-planned renovation can change, both in how a bathroom looks and how it works day to day.
The Bath and Vanity Area
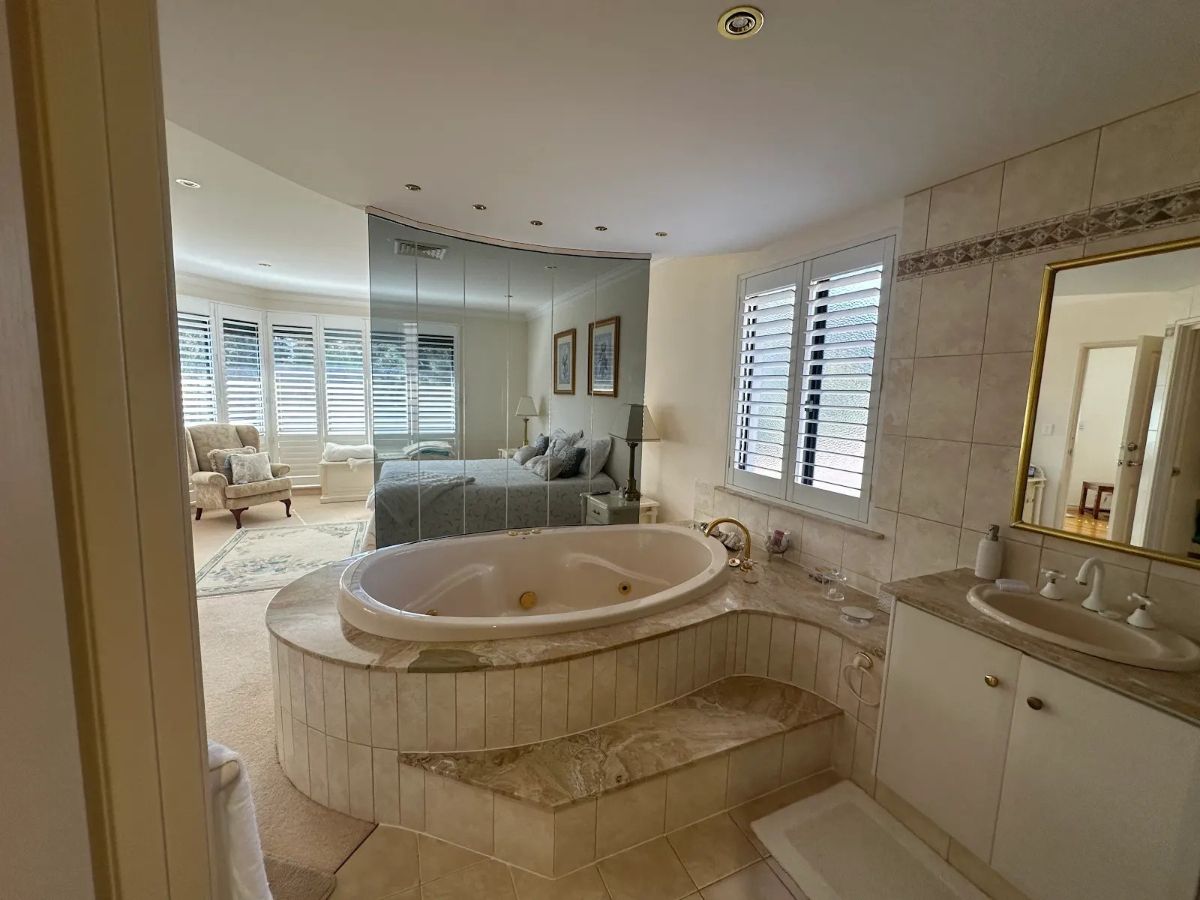
Before: A corner spa bath sat on a raised, tiled platform inside the bedroom, closed off by curved tinted glass. It made a statement, but it took up a lot of floor space, and the steps up to it made it harder to get in and out. Around the spa, beige tiles with decorative border strips, a gold-framed mirror and a marble-look vanity top made the room feel heavy and dated.
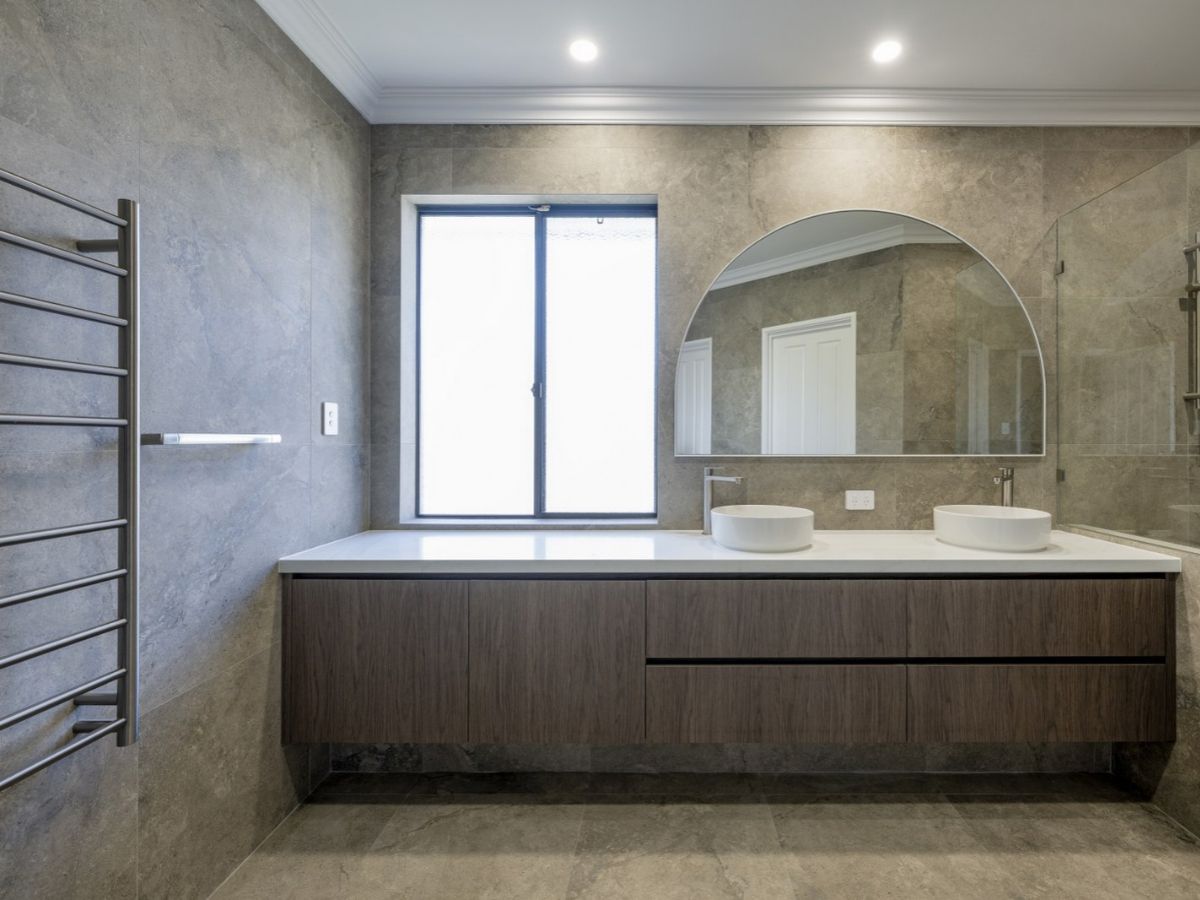
After: Large-format stone-look tiles now run from floor to ceiling, so there are fewer grout lines and no busy borders. A long timber floating vanity with double basins and an arched mirror gives two people their own space, with a heated towel rail on the wall beside it.
The Shower
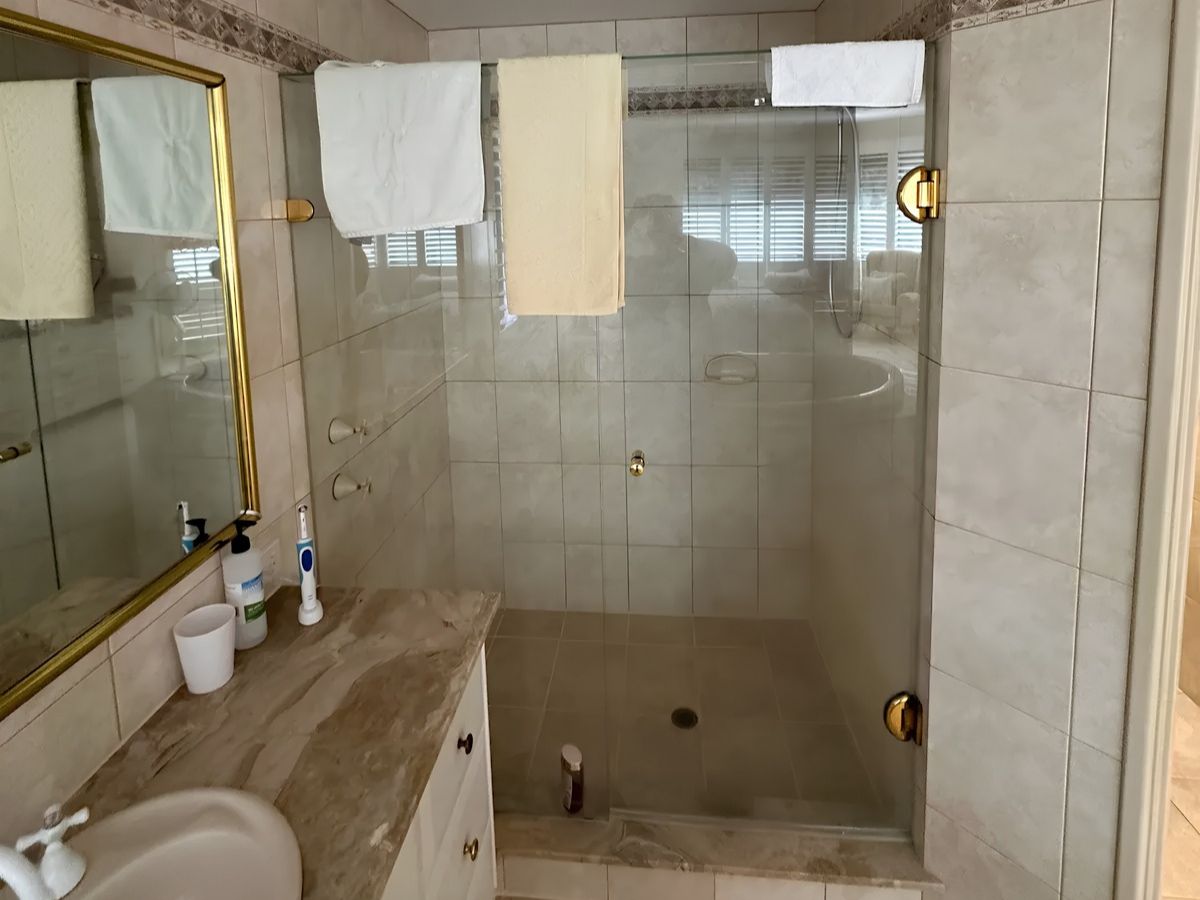
Before: The shower sat on a raised hob behind a framed glass door with brass hinges, surrounded by beige tiles and a border strip.
After: A walk-in shower with a frameless glass panel and a recessed niche for toiletries. It’s easier to step into, easier to clean and helps the whole ensuite feel more open.
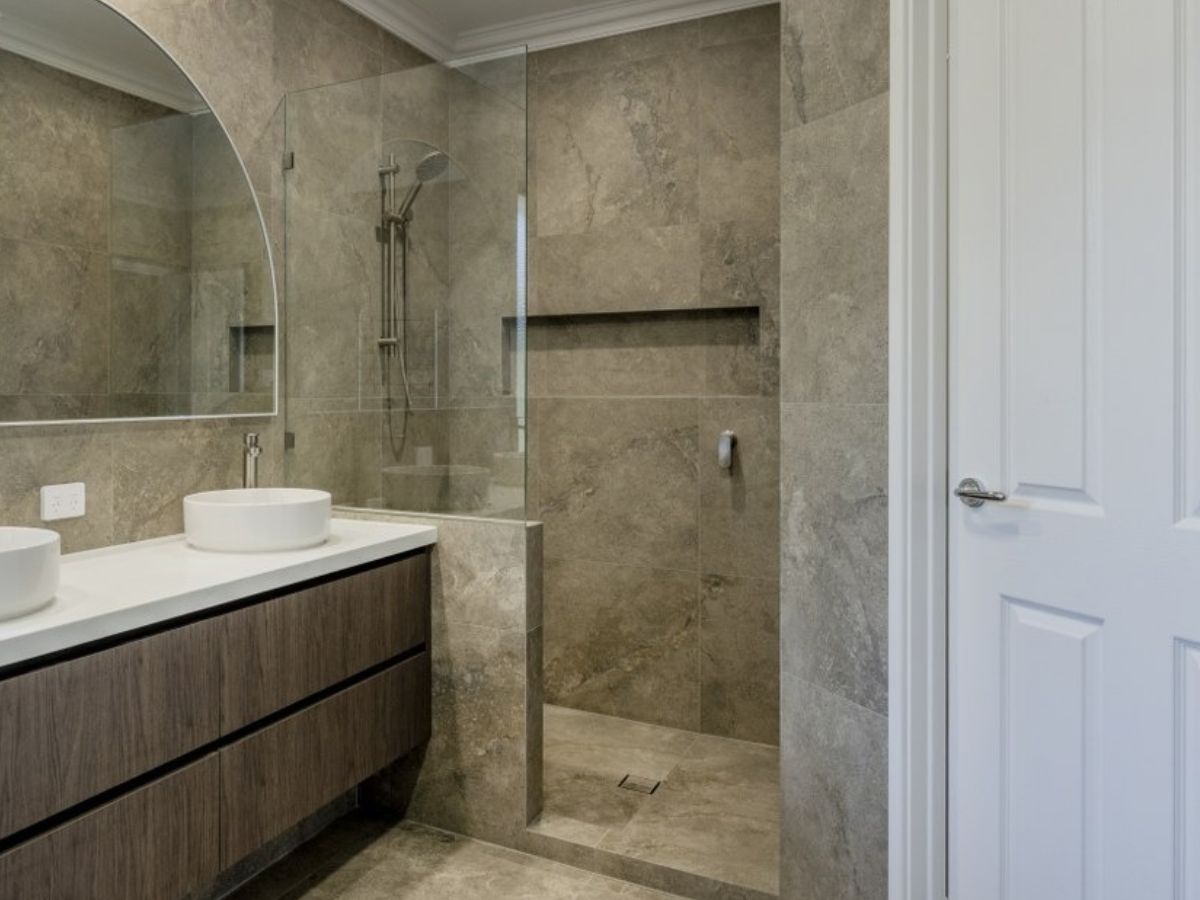
You can see more of the finished space on our Hillarys bathroom renovation project page, or explore our ensuite bathroom renovations in Perth. If you’re planning an ensuite of your own, our ensuite bathroom renovation ideas are a good place to start.
Bathroom Renovation Before And After Ideas
Most bathroom renovations follow a similar pattern: what was dark, cramped or dated becomes lighter, simpler and easier to live with. These are the before and after ideas worth considering for your own bathroom.
From a Hobbed Shower to a Walk-In Shower
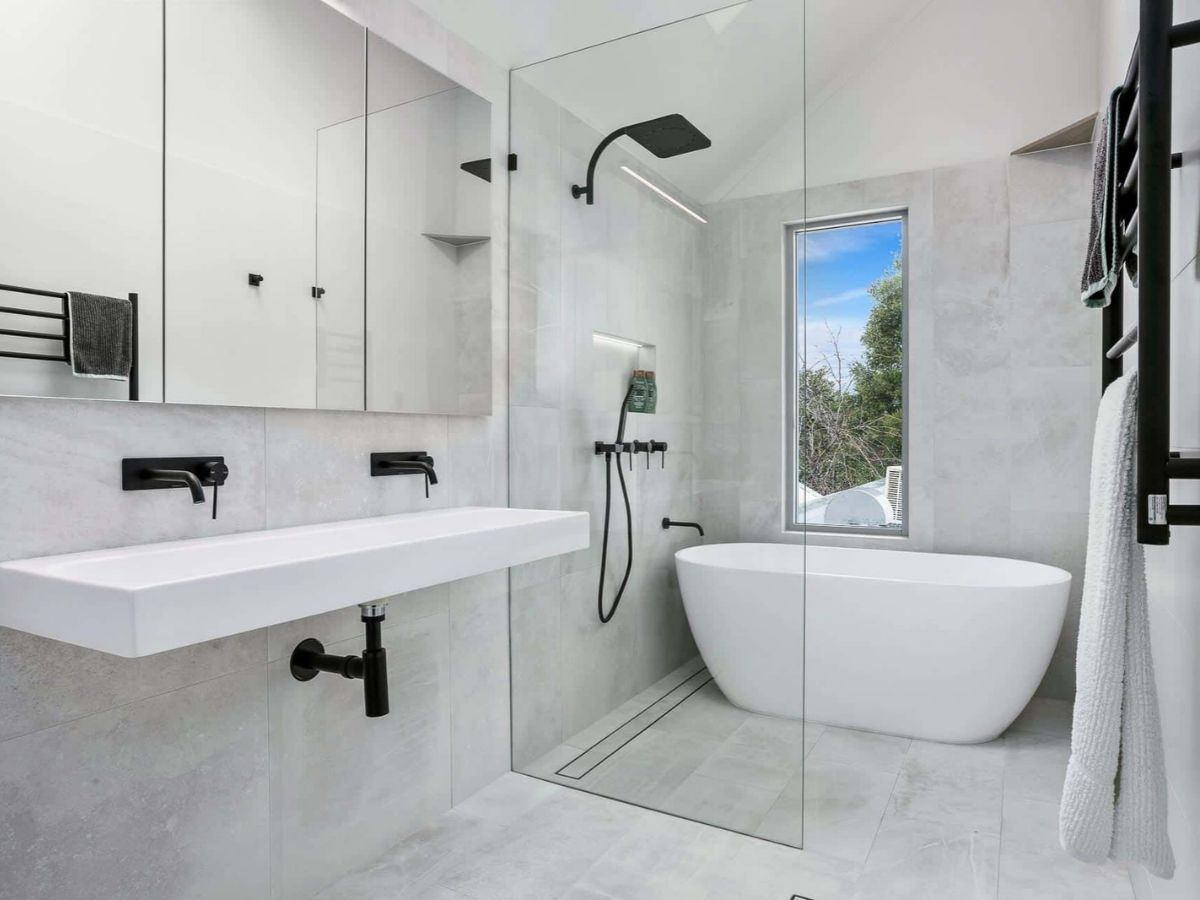
Before: a raised hob, a framed screen and a door you have to squeeze past.
After: a level entry and a single frameless glass panel.
Removing the hob makes the shower easier to step into and gives the floor one continuous line, so even a modest bathroom looks bigger. In older bathrooms with enough space, some homeowners go a step further and open the shower into a wet room, where the shower and bath share one waterproofed zone. Our walk-in shower ideas cover screens, drains and layouts in more detail.
From Busy Tiles to Large-Format Tiles
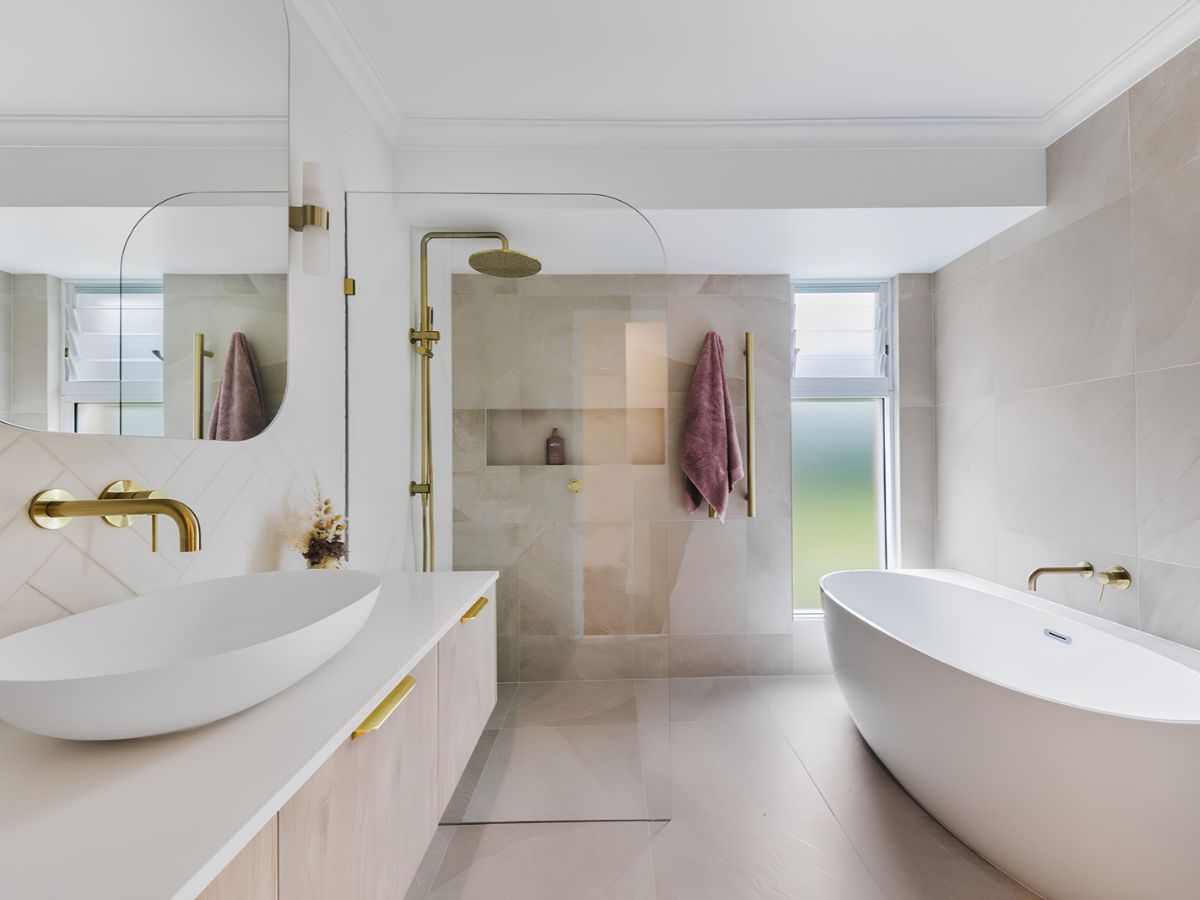
Before: small tiles, contrasting grout and decorative border strips that break the walls into bands.
After: large-format porcelain tiles running from the floor up the shower walls.
Fewer grout lines reduce visual clutter, so the room feels calmer and there’s less to scrub. Choose a slip-resistant finish for the floor tiles, and test samples in the room itself before you commit, because tiles can look very different under your own lighting. You’ll find more inspiration in our bathroom tile ideas.
From a Bulky Vanity to a Floating Vanity With Smart Storage
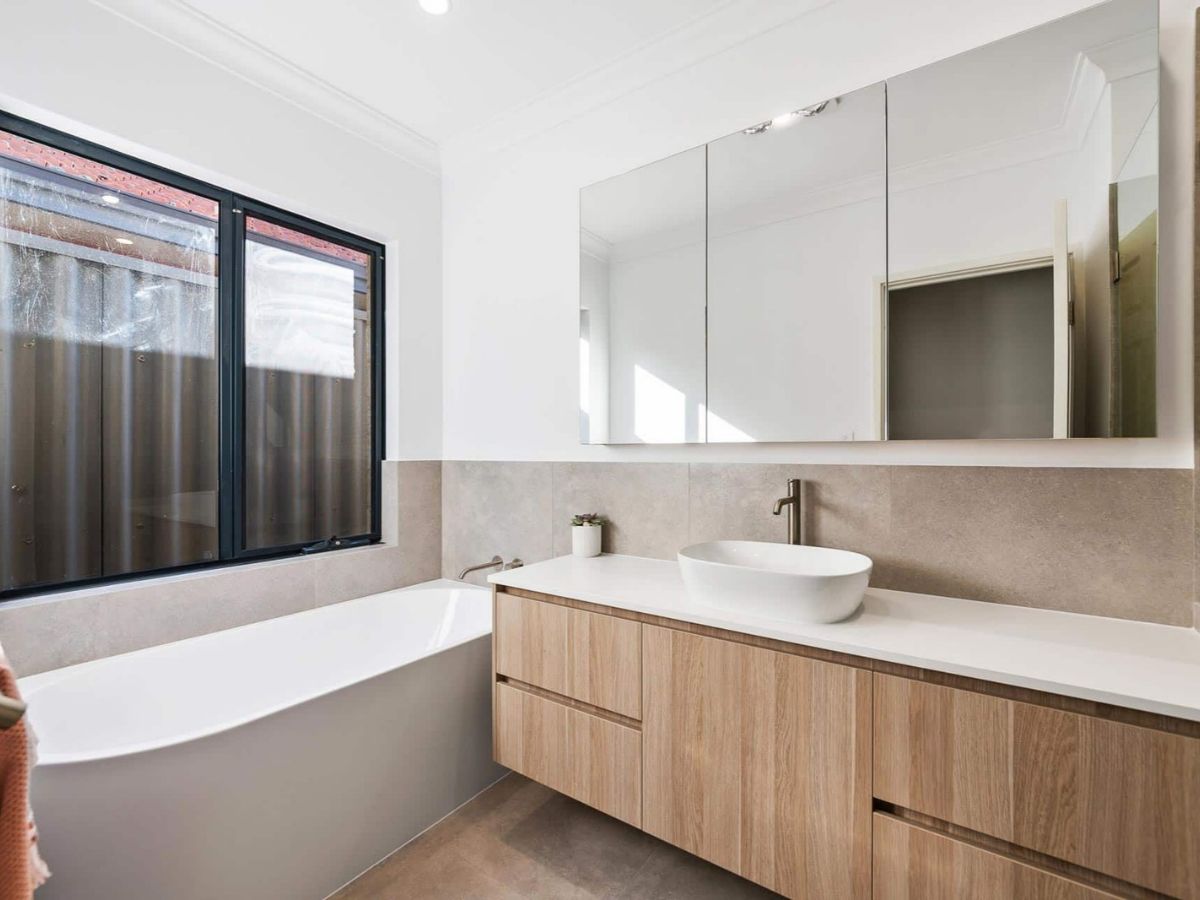
Before: a floor-standing cabinet with deep cupboards where everything ends up at the back.
After: a wall-hung vanity with drawers, so you can see the floor underneath and find things easily.
Deep drawers keep hairdryers and toiletries in their place, while a mirrored cabinet or recessed shower niche takes care of the rest. Pair it with a durable, stain-resistant benchtop and you have enough storage without crowding the room. It’s one of the simplest space-saving designs, and our small bathroom design ideas have more tips if your bathroom is compact.
From One Ceiling Light to Layered Lighting and Better Ventilation
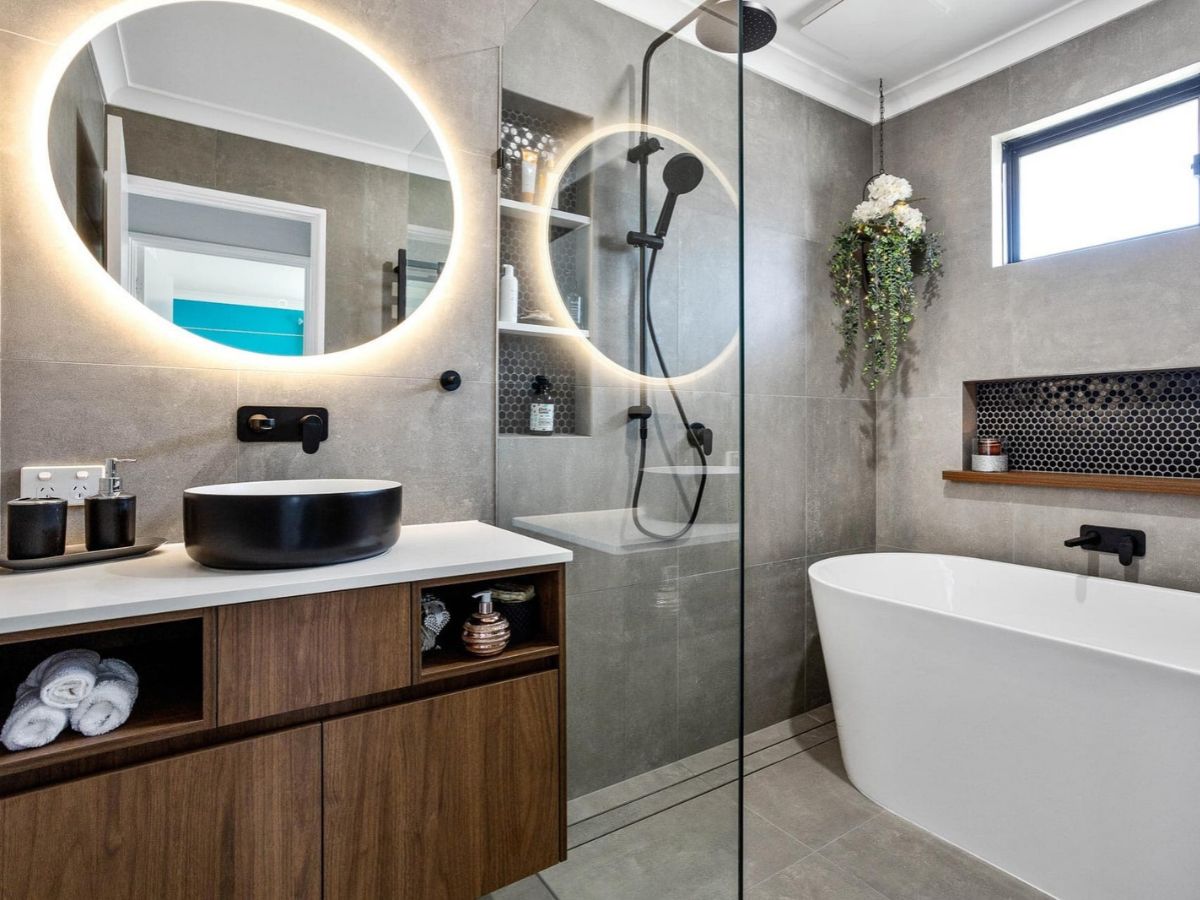
Before: a single ceiling light that casts shadows at the mirror, and an old exhaust fan that struggles to clear the steam.
After: layered lighting, with an illuminated mirror for grooming, downlights for general light and perhaps an LED strip in the shower niche.
Natural light helps too, through a frosted window or skylight where the layout allows. Upgrading the exhaust fan is just as important, because good ventilation controls humidity and helps prevent mould growth, which protects your new finishes. Our bathroom lighting ideas go into placement and fittings.
From Cool Whites and Greys to Warmer, Natural Finishes
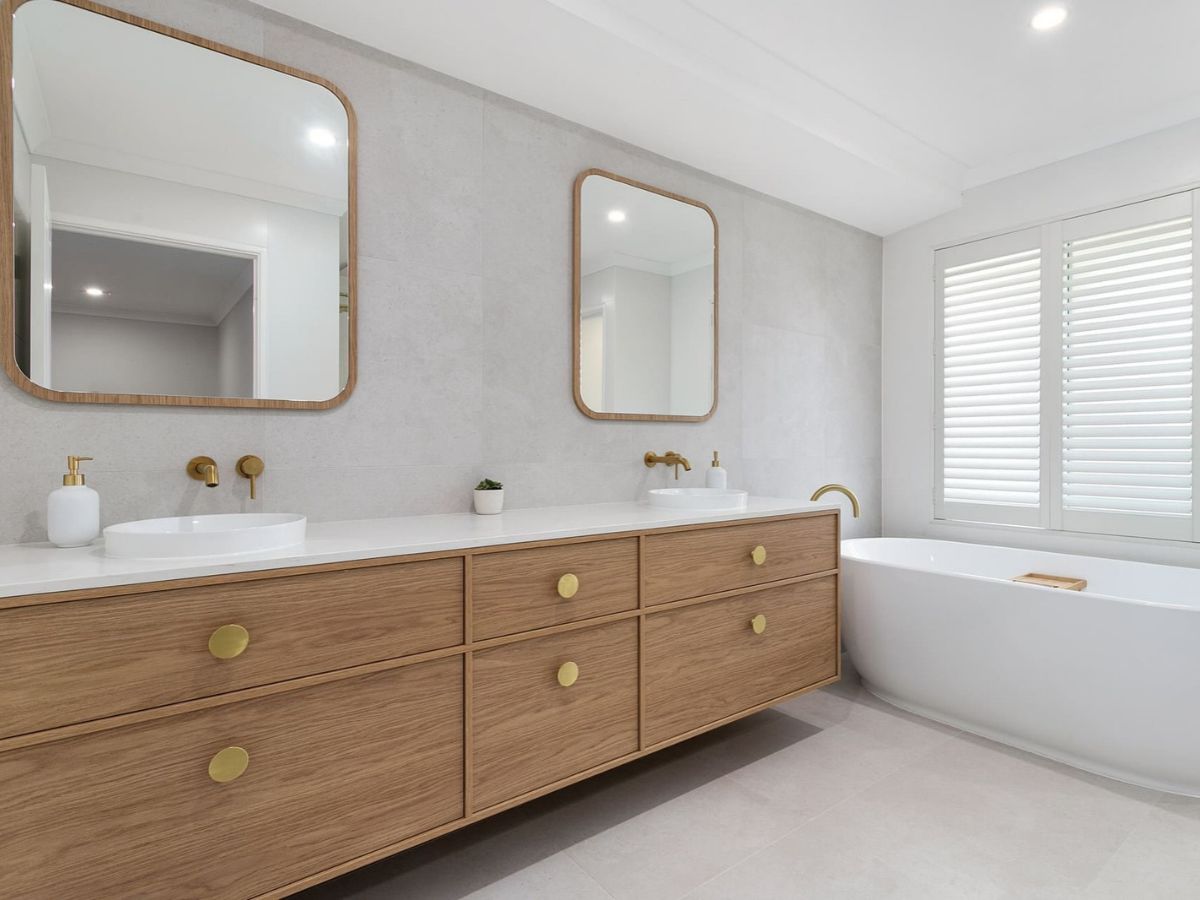
Before: stark white tiles, grey on grey and basic chrome fittings.
After: timber-look vanities, stone-look tiles in soft beige, and fixtures in brushed brass, brushed nickel or matte black.
Warmer, more tactile finishes suit Perth’s bright natural light and make the room feel more relaxed. If you have the space, a freestanding bath can become a sculptural focal point, which is a common feature of a luxury bathroom renovation. For the finishing touches, choose towel rails, robe hooks and taps in the same tone so everything ties together.
Bathroom Renovation Checklist Before Work Starts
The planning phase decides how smoothly everything else goes. Use this bathroom renovation checklist to tick off the big decisions before construction begins, the same way you would when planning a home renovation on a larger scale.
- Confirm the layout. Decide early whether fixtures stay put, since layout changes affect cost and approvals. Our bathroom layout ideas can help you weigh it up.
- Check your existing plumbing. Make sure new fixtures, like a wall-hung toilet, suit the existing plumbing.
- Choose fixtures and materials. Lock in tiles, tapware and the vanity, using moisture-resistant materials.
- Order early. Some materials have long lead times, so order before work starts to avoid delays.
- Get a detailed quote. It should list the scope, materials, waterproofing, plumbing and electrical work.
- Check permits and approvals. Structural changes may need a building permit. Strata properties and heritage homes can have extra rules, so check first.
- Set a contingency buffer. Keep 10 to 15% of your budget aside for hidden issues, especially in older homes.
How Long Does a Bathroom Renovation Take?
A typical bathroom renovation takes around two to four weeks once work starts. It can run longer if the layout changes or the job involves more complex building work. The planning phase before that, from design through to ordering materials, often takes longer than the build itself, so it pays to start early.
Here’s how a typical bathroom renovation timeline unfolds:
| Stage | What happens |
|---|---|
| 1. Planning and design | Layout, fixtures and finishes are confirmed, and you see the design in 3D before anything is built |
| 2. Ordering materials | Tiles, tapware and vanities are ordered early to allow for lead times |
| 3. Demolition | The old bathroom is stripped back to the frame, and any hidden issues come to light |
| 4. Rough-in | New plumbing and electrical work is installed behind the walls and floor |
| 5. Waterproofing | Wet areas are sealed to Australian Standard AS 3740 before any tiling |
| 6. Tiling | Floor tiles and wall tiles are laid, from the first tile through to the shower niche |
| 7. Fixture installation | The vanity, toilet, shower set, tapware and towel rails go in, followed by the final plumbing and electrical connections |
| 8. Finishing touches | Painting, mirrors, robe hooks and a final clean and check |
Each stage relies on the one before it. A late delivery or a hidden issue found during demolition can push everything back, which is why ordering early and keeping a contingency buffer make such a difference.
Bathroom Renovation Mistakes To Avoid
Some mistakes are easy to avoid if you know about them early. These are the ones that tend to cost the most time and money to fix:
- Changing your mind once work starts. Late changes mean undoing finished work, which adds extra costs and delays. Settle the details at the design stage.
- Leaving electrical decisions too late. Heated towel rails, power points, lighting and the exhaust fan need wiring before tiling, or you’ll be cutting into new tiles later.
- Treating waterproofing as a box to tick. It must meet Australian Standard AS 3740, and once it’s tiled over, you can’t see it. If it fails, leaks can cause mould growth and costly structural damage.
- Doing plumbing or electrical work yourself. In WA, homeowners can only do minor jobs like replacing a shower head. Moving pipes or installing new fixtures needs a licensed plumber(opens in new tab), and electrical work needs a licensed electrician.
- Not asking for your compliance certificate. For new fixtures, your plumber must give you a certificate of compliance within five working days. Keep it as proof the work meets plumbing standards.
- Choosing a quote on price alone. A cheap quote that leaves out waterproofing or electrical work can cost more once the extras are added.
For mistakes that apply to the rest of the house, see our guide to common home renovation mistakes.
Planning Your Own Bathroom Before and After
Every great “after” starts with a clear plan. At Navigate Interiors, we manage our bathroom renovations from the first design conversation and 3D visuals through to the finishing touches, so you’re not left coordinating trades yourself.
To see what’s possible, browse our recent projects or visit our Balcatta showroom to see finishes in person. When you’re ready, start your project and choose an in-person consultation or a quote by email. You can even upload photos of your current bathroom, which makes a handy record of your own “before”.
Frequently Asked Questions
For many homeowners, it’s the planning rather than the build. Settling on a layout, fixtures and finishes, and sticking with those decisions, takes more time than expected. On the build side, waterproofing and dealing with hidden issues behind old tiles are the stages that need the most care.
Get Started
Navigate Interiors will bring help to bring your next project to life.