Most people planning a bathroom renovation get caught up in tiles and tapware before they’ve settled on a layout. It’s easy to do. But the layout is the foundation of your whole project. Get it right, and everything else falls into place. Get it wrong, and even the nicest bathroom fixtures in the world won’t save you from potential redos and design issues down the line.
Whether you’re looking at a full overhaul or partial bathroom renovations, this guide covers practical bathroom layout ideas, what the renovation process actually looks like, and how to plan a new bathroom that works for your lifestyle.
Why Good Bathroom Design Starts With The Right Layout
A bathroom layout isn’t just about where the toilet goes. It’s about how the space flows. How much floor space you have to work with. Where the plumbing is. Whether the door swings into the vanity. These things matter enormously once you’re actually using the room.
In a small bathroom, poor planning turns limited space into a daily frustration. In larger bathrooms, it can mean wasted corners and awkward dead zones. The goal of any bathroom design is to match the physical space to how you actually live, not just what looks good in a photo.
A few principles worth keeping in mind from the start:
- Keep wet areas contained. Placing the shower and bath on the same wall reduces the amount of waterproofing required and simplifies plumbing.
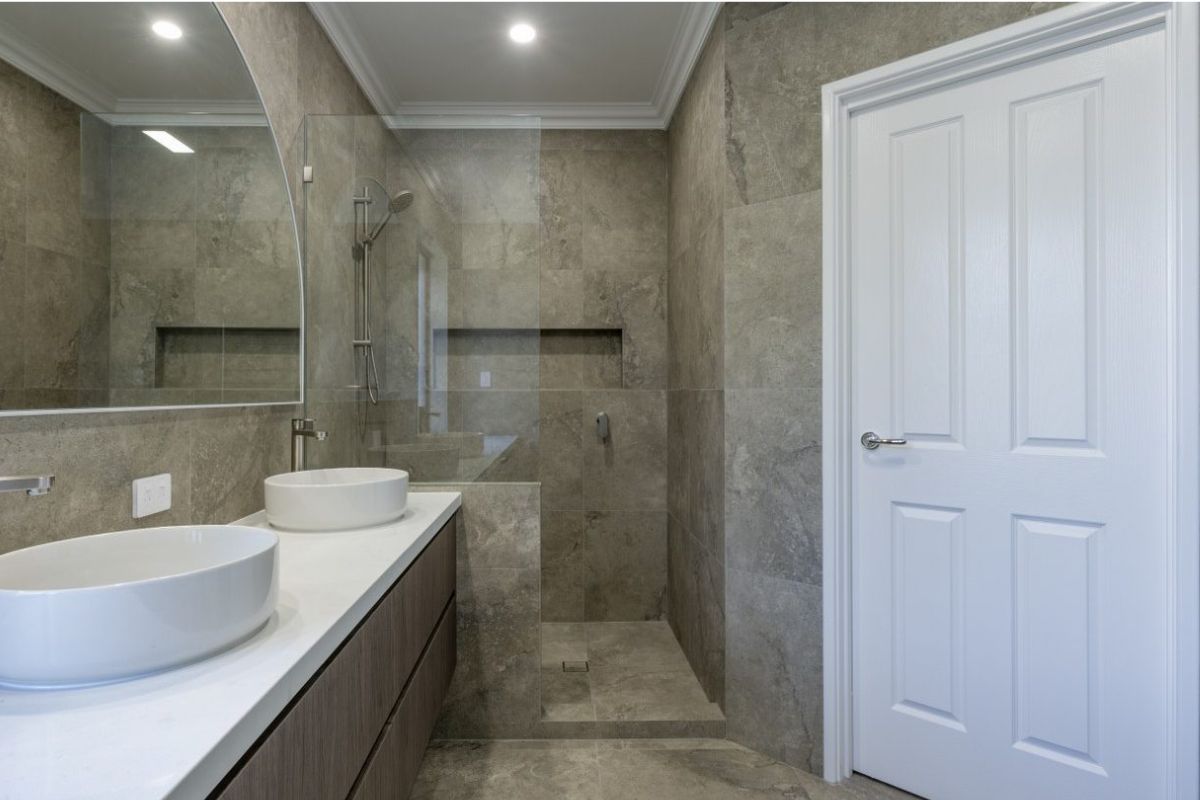
- Allow clear movement paths. There should be enough room to open the glass screen, use the toilet, and reach the bathroom vanity comfortably without stepping around anything.
- Think about storage early. Recessed niches, wall-hung cabinetry, and built-in shelving need to be planned before walls are tiled, not after.
- Separate the toilet where possible. Even a partial separation, such as a low wall or a separate toilet room, improves privacy and daily functioning.
Practical Bathroom Layout Ideas For Every Space
Not every bathroom has the same footprint. Here are some layout approaches that work well for your current spaces or needs.
Small bathroom (under 5 m²)
In a small bathroom renovation, the priority is making the most of what you have. Wall-hung vanities free up floor space visually and make cleaning easier. A frameless glass screen instead of a shower curtain keeps the room feeling open. A back-to-wall toilet with concealed plumbing in the wall looks cleaner and saves a few centimetres.
Narrow bathroom
Long, narrow rooms benefit from placing the shower at the far end with the vanity and toilet along one wall. This creates a clear line of sight, making the space feel longer. Large-format floor tiles laid lengthways can also add to that effect.
Family bathroom
If the bathroom is shared between several people, a double vanity is worth the investment. Separating the toilet into its own separate room reduces morning congestion significantly.
Families with young children may prefer a separate bath, while older children may benefit more from a larger walk-in shower. Think about towel rail and bathroom accessory placement, too. Four people sharing one towel rail doesn’t work. Towel hooks are a great way to utilise walls and increase the amount of hanging space.
Ensuite or luxury bathroom
When there’s more floor space to work with, you have options. A freestanding bath as a centrepiece, pendant lights over the vanity (which often floats), and a considered colour scheme can all come together in a way that feels genuinely luxurious without being excessive.
Luxury bathrooms are all about open flow. And when you have the space, you can prioritise establishing wet and dry zones. The toilet location is important, too. In luxury bathrooms, toilets are never the first thing you see. They’re often tucked away in a completely separate room or hidden behind a privacy wall for maximum hygiene.
Accessible or ageing-in-place design
An accessible bathroom layout should provide enough clear space for comfortable movement between the toilet, shower, vanity and doorway. The layout should minimise obstacles and allow space for turning, transferring and receiving assistance where required.
Curbless showers with linear drains are popular for this, and they look great too. Wider doorways, a bath with easy entry, slip-resistant flooring, and grab-rail placement that’s been properly planned from the start make a huge difference for long-term usability.
Your Bathroom Renovation Process Checklist
Understanding the bathroom renovation process ahead of time reduces stress and keeps the project on track. Here’s a simplified version of how a well-managed renovation project typically runs:
- Brief and design. Settle on the layout, fixtures, tiles, and colour scheme before anything else moves.
- Selections and ordering. Custom cabinetry, stone benchtops, and frameless glass screens all have lead times. Cabinetry typically takes three to five weeks to manufacture, and glass screens around seven to ten business days after measuring. Order early.
- Demolition. Old fixtures, wall linings, and floor tiles come out. This is also when any structural changes or plumbing relocations happen.
- Waterproofing. The waterproof membrane goes down before any tiling. The waterproofing in Australian bathrooms must strictly comply with AS 3740. Tiles and grout are not the primary waterproof barrier. The waterproofing system beneath the tiles is the main barrier preventing moisture from entering walls, floors and surrounding building materials.
- Tiling. Floor tiles and wall tiles go in. If you’re doing full-height tiling, this is one of the more time-consuming stages. Find inspiration for bathroom tile ideas in our blog, which explores modern tile styles and trending bathroom colours.
- Fixtures and fittings installation. These include the vanity, toilet, shower head, tapware, towel rails, bathroom accessories, and electrical work, including exhaust fans and lighting.
- Final inspection. A thorough check of all wet areas, installation quality, and compliance items before handover.
It’s worth having a project manager across the whole process. Managing trades, deliveries, and on-site timelines without someone coordinating them is genuinely difficult.
Layouts that Prioritise Natural Light and Ventilation in Wet Areas
Perth’s climate is genuinely an asset for bathroom layout and design. Installing windows, skylights, or louvres brings in natural light year-round, making any bathroom feel more spacious and helping manage moisture during cooler months.
Ventilation should be planned alongside the layout rather than added later. Exhaust fans need to be positioned where steam and moisture build up most. The NCC 2022 ventilation requirements specify a minimum exhaust rate of 25 litres per second for bathrooms without openable windows, with the exhaust fan interlocked to the light switch. Good exhaust fans, ideally with humidity sensors, protect the ceiling, walls, and waterproof membrane from moisture damage over time.
A well-planned layout balances natural light, privacy and moisture control. Avoid blocking windows with tall cabinetry, and make sure airflow can move through the room without being restricted by full-height walls or poorly positioned fixtures.
What Happens at Final Inspection
The final inspection is the last step before your new bathroom is handed over. At Navigate Interiors, our renovation team reviews every element on-site. Layouts, tiling, grouting, fixture installation, the glass screen, cabinetry alignment, silicone sealing, and all electrical work, including exhaust fans and lighting.
You can see how this plays out across our recent Perth projects if you’d like a sense of the finish we deliver.
If you’re planning a bathroom renovation in Perth and want to talk through your layout options, we’d be glad to help. Contact our renovation team to arrange an obligation-free design consultation. We’ll look at your space, your budget, and your goals, and give you a clear picture of what’s possible.
Frequently Asked Questions
Should a bathroom door open inwards or outwards?
An inward-opening door is more common, but it can take up valuable floor space and interfere with the vanity, toilet or shower. In smaller bathrooms, an outward-opening door or a cavity sliding door could free up some much-needed space.
Where should power points be positioned in a bathroom?
Power outlets are usually positioned near the vanity for appliances such as hair dryers, electric shavers, and toothbrush chargers. Their placement must comply with electrical safety requirements for wet areas, so they should be planned with a licensed electrician before cabinetry and tiling begin.
How can you add more storage to a bathroom without making it feel smaller?
Wall-mounted vanities, mirrored cabinets, recessed niches and tall, shallow cupboards can provide storage without taking up too much floor space. Storage should be planned around where items are used to keep the room practical and uncluttered.
Get Started
Navigate Interiors will bring help to bring your next project to life.